Creating and rendering a bitmap font
Published
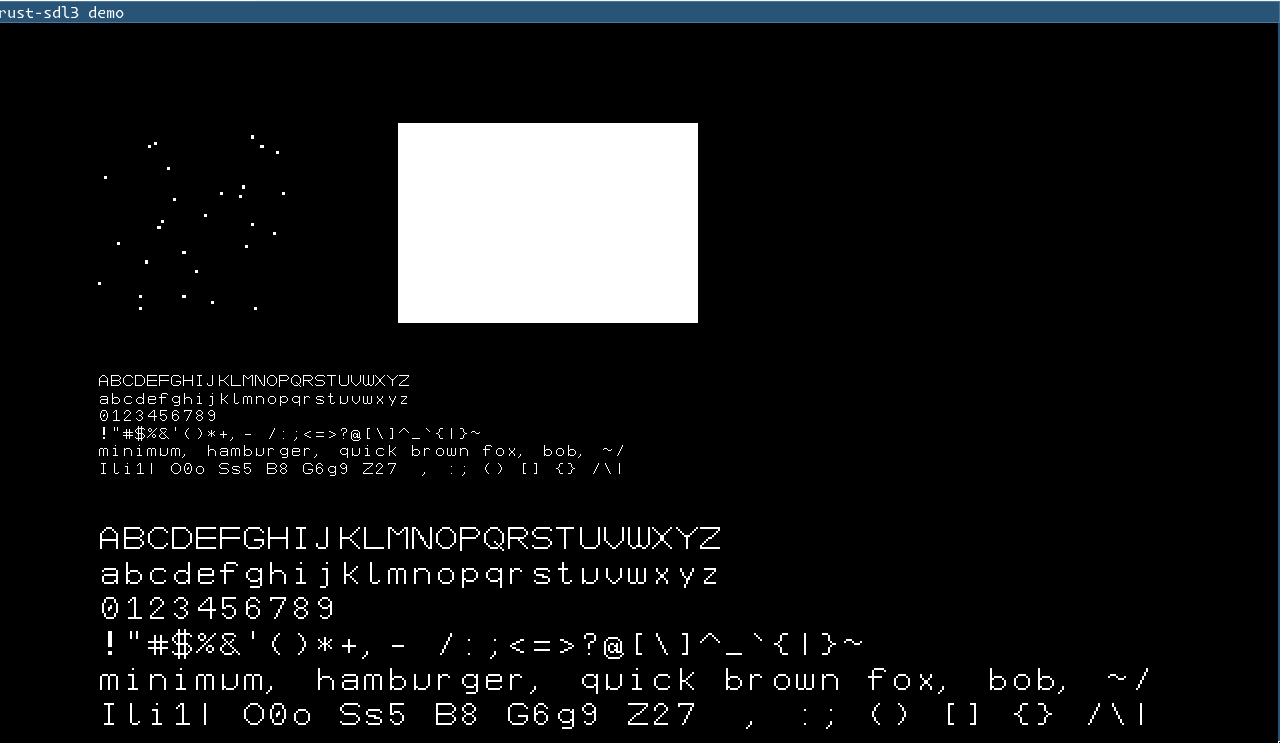
When I was a kid I learned how to program by making games. At the end of 2025 I felt the urge to re-discover that magic. I didn't expect drawing a font would be one of the most satisfying parts.
Getting back into game development
I created my own versions of classic games like Tetris, Snake and Breakout. All written from scratch in a mix of C and C++ (I was young and I didn't know any better).
One of my goals with this game was to build as close to the platform as possible. I wanted to be in charge of most of the code the game ran. I got this idea by watching episodes of both Handmade Hero and the excellent Wookash Podcast.
As such I allowed myself a single dependency: SDL. My plan was to work on the game whenever I had some spare time and this meant I'd be developing on both my Linux workstation as well as on my MacBook. Dealing with X and Cocoa so early on did not sound fun. Plus the games I built as a kid were using SDL 🙂.
Choosing a font format
With my "no dependencies rule", rendering text became a thing I had to build myself.
I could have written a parser for OpenType but that's non-trivial and I wanted to get something out as soon as possible. After some searching (and prompting) around I discovered the PC Screen Font format. PSF2 is a bitmap font with a very simple layout: a 32 byte header followed by a bitmap for each glyph followed by an optional Unicode table. The table at the end specifies how characters map to each glyph. Check out the linked article to see a breakdown of the PSF2 format.
Drawing glyphs
Writing the PSF2 parser was not complicated but then I needed a test subject to make sure it worked. I didn't want to use an external font for this so naturally, I just had to draw my own font. I keep creating work for myself, don't I? At least it was fun.
I'm no artist, so I chose the programmer way of drawing things: ASCII-art.
....#..#....
....#..#....
...#######..
..#.#..#..#.
.#..#..#....
.#..#..#....
..#.#..#....
...######...
....#..#.#..
....#..#..#.
....#..#..#.
.#..#..#.#..
..#######...
....#..#....
....#..#....
............
............
............
....###.....
...#...#....
..#.....#...
.#.......#..
.#.......#..
.#.......#..
.#########..
.#.......#..
.#.......#..
.#.......#..
.#.......#..
............
............
........................
............
............
............
............
....####.#..
...#....##..
..#......#..
..#......#..
..#......#..
...#....##..
....####.#..
.........#..
.........#..
....#####...
........................
............
............
............
............
.####.####..
#....#....#.
#....#....#.
#....#....#.
#....#....#.
#....#....#.
#....#....#.
#....#....#.
............
............
............
Each . and # in the file represents a pixel in the bitmap: a . is a
transparent pixel while a # is a filled pixel. The text-based layout meant it was very easy for me to
churn out glyphs in NeoVIM, plus it was very simple for me to edit previous glyphs when I decided to change the
width, height or baseline.
| Character set | 95 printable ASCII characters |
|---|---|
| Spacing | Monospace |
| Cell size | 12×16 pixels |
| x-height | 8 pixels |
| Baseline | 13 pixels from the top |
I landed on 12×16 glyphs after drawing a couple of different characters of various widths/heights.
Compiling the font
Once I had a couple of glyphs I needed to turn them into a proper .psf file. To do this I wrote a
command
which compiled the directory of glyphs I had into a single font file. Each glyph file was named after the numeric
ASCII code (eg. 65 for A). The command checked that each glyph had the same dimensions
(hehe, I discovered a couple of extra lines and columns I managed to add with nvim) then wrote the PSF header
followed by bitmaps for every glyph.
The glyph bitmaps use packed representation, ie each pixel takes up a single bit + padding to get a whole number of bytes per line. My 12px wide glyphs required 2 bytes per row (with padding). This is the code to generate the bitmap for a single row of a glyph:
for (chunk_num, chunk) in line.as_bytes().chunks(8).enumerate() {
  let mut byte = 0;
  for (bit, &pixel) in chunk.iter().enumerate() {
      match pixel {
          b'.' => {}
          b'#' => byte |= 0x1 << (7 - bit),
          _ => {
              return Err(format!(
                  "expected only . and # at line {} column {}: {}",
                  line_num + 1,
                  chunk_num * 8 + bit + 1,
                  char::from(pixel)
              ));
          }
      }
  }
  bitmap.push(byte);
}
The bitmap stores pixels as left-column first so the line byte |= 0x1 << (7 - bit) maps the
character
position to the right bit in the byte (e.g. the left-most character 0 goes in bit 7, ie the highest bit and so on).
Rendering on screen
I can't render a packed bitmap on screen so the next step was converting it to a texture I could use in SDL. In order to keep rendering efficient I created a texture atlas which contained all 95 glyphs in rows of 16 glyphs each. Finding the start position of a glyph in the atlas was a simple operation:
let cell_x = (glyph_index % columns) * glyph_width;
let cell_y = (glyph_index / columns) * glyph_height;
Each pixel of the bitmap became a full RGBA pixel. I used the alpha channel to turn on or off each pixel.
To draw text on screen I look up the glyph each character maps to and then find its corresponding cell in the atlas. The rendering code then draws a quad using that cell's coordinates as texture coordinates
for ch in text.chars() {
  if ch == '\n' {
      pos += new_line;
      pos.set_x(position.x());
      continue;
  }
  if let Some(glyph_index) = self.unicode_table.glyph_index(ch) {
      let quad = self.font_atlas.glyph_quad(glyph_index);
      let (u0, v0) = quad.top_left();
      let (u1, v1) = quad.bottom_right();
      let glyph_width = Vec2::new(glyph_width, 0.);
      let glyph_height = Vec2::new(0., glyph_height);

      let vertices = [
          RenderVertex { position: pos, color, uv: (u0, v0), },
          RenderVertex { position: pos + glyph_width, color, uv: (u1, v0), },
          RenderVertex { position: pos + glyph_width + glyph_height, color, uv: (u1, v1), },
          RenderVertex { position: pos + glyph_height, color, uv: (u0, v1), },
      ];

      frame.push_render_object(
          Some(self.font_texture),
          RenderSpace::Screen,
          None,
          &vertices,
          &[[0, 1, 2], [2, 3, 0]],
      );
  }

  pos += new_letter;
}
And here's what the first version of the font looked like:
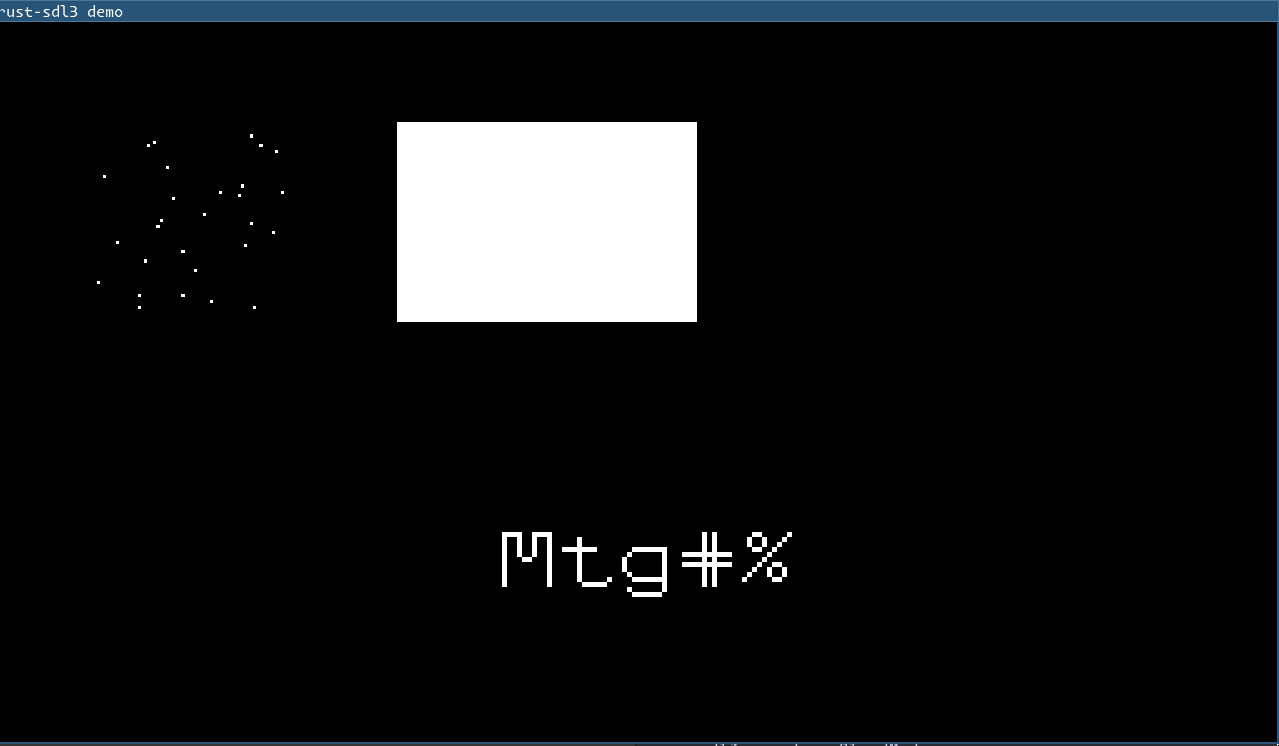
I then finished the entire set of 95 printable ASCII characters tweaking the glyphs until I liked them (and they mostly looked consistent). It's a small thing but seeing text rendered in a font I drew myself is surprisingly satisfying.
The game code is still evolving. You can play a build of it on GitHub